Aliasing g

This isn’t so much of a Vim tip (sorry), but a terminal tip that has made a lot of difference to my workflow recently, so much so that I’ve bent the rules slightly and posted it today.

This one is courtesy of Ben Orenstein’s dotfiles, from which I have picked up a lot of good things, including this shell function:

function g {
   if [[ $# > 0 ]]; then
     git $@
   else
     git status
   fi
}

This does a really simple thing, and remaps g on your command line. If you call g on its own, you’ll call git status, but if you pass it an argument, it will pass that through to git.

For example:

g => git status
g diff => git diff
g commit => git commit

Of course, you should also set up some aliases for common commands to save yourself more typing.

comments powered by Disqus… Click Here


Making `j` and `k` work on visual lines

Sorry for the hiatus – conferences have kept me busy. Posts will return to mostly daily rate from now on.

Four of the most important lines in my vimrc file are:

nnoremap k gk
nnoremap j gj
nnoremap gk k
nnoremap gj j

You see by default, k and j go up and down physical lines, not visual lines. What this means is that if you’ve one line but it wraps and spans more than one on your screen, j or k will jump up or down to the next physical line, and skip the wrapped lines of the current line you’re on. This is a bit confusing, so hopefully this helps:

1 this is the first line
2 this is the second line but imagine
3 it has been wrapped {C}around because
4 you're on a really small screen
5 and it wont fit on one line

If you imagine your cursor is where the {C} is and you press k, you wont end up on line 2 as you might expect, but on line 1, because k has gone to the next physical line, which is line 1. It doesn’t respect line wraps. However, gk does respect line wraps, so if you’re on line 3 and hit gk, you will end up on line 2. Personally I prefer this behaviour, so these four mappings swap k to work like gk and gk to work like the default k behaviour, and then obviously the same for j.

nnoremap k gk
nnoremap j gj
nnoremap gk k
nnoremap gj j

Thanks to Yubin Kim for his collection of Vim tips, which is where I stole that mapping from.… Click Here


Fuzzy finding with FZF.vim

I’ve been through my fair share of Vim file finding plugins. I first started with Command-T before moving on to CtrlP. I then stole a colleague’s set up which used Gary Bernhardt’s selecta finder. You can find the config for that in my old vimrc.

That had been serving me well but I then stumbled upon Junegunn Choi’s excellent fzf, a great fuzzy finder that (from my experience so far) seems incredibly quick and extremely reliable. Thankfully he’s also created fzf.vim, a Vim wrapper around some common functionality that fzf provides. It’s this that I want to show you today.

Installing is fairly straight forward, and it’s recommended you use Vim-Plug to do it:

Plug ‘junegunn/fzf’, { ‘dir’: ‘~/.fzf’, ‘do’: ‘./install -all’ } Plug ‘junegunn/fzf.vim’

Once done you’ll have access to a bunch of new commands that will use fzf to find files, lines and more.

Finding Files

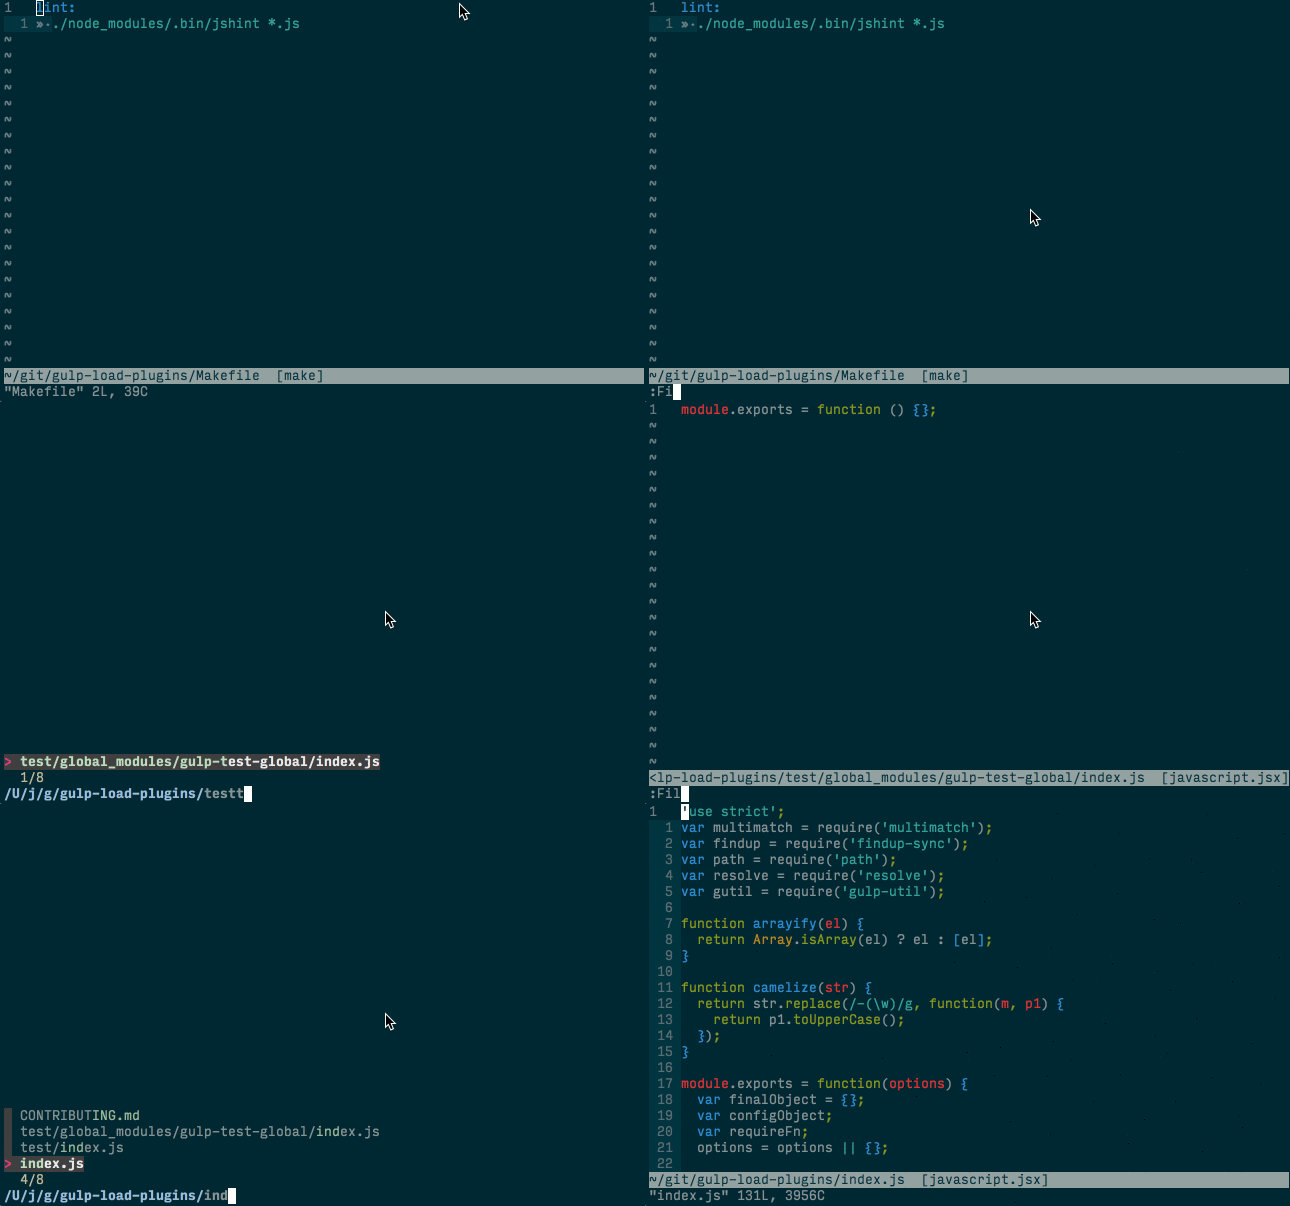
You can use the :Files command to search for files in your directory.


Finding Commits

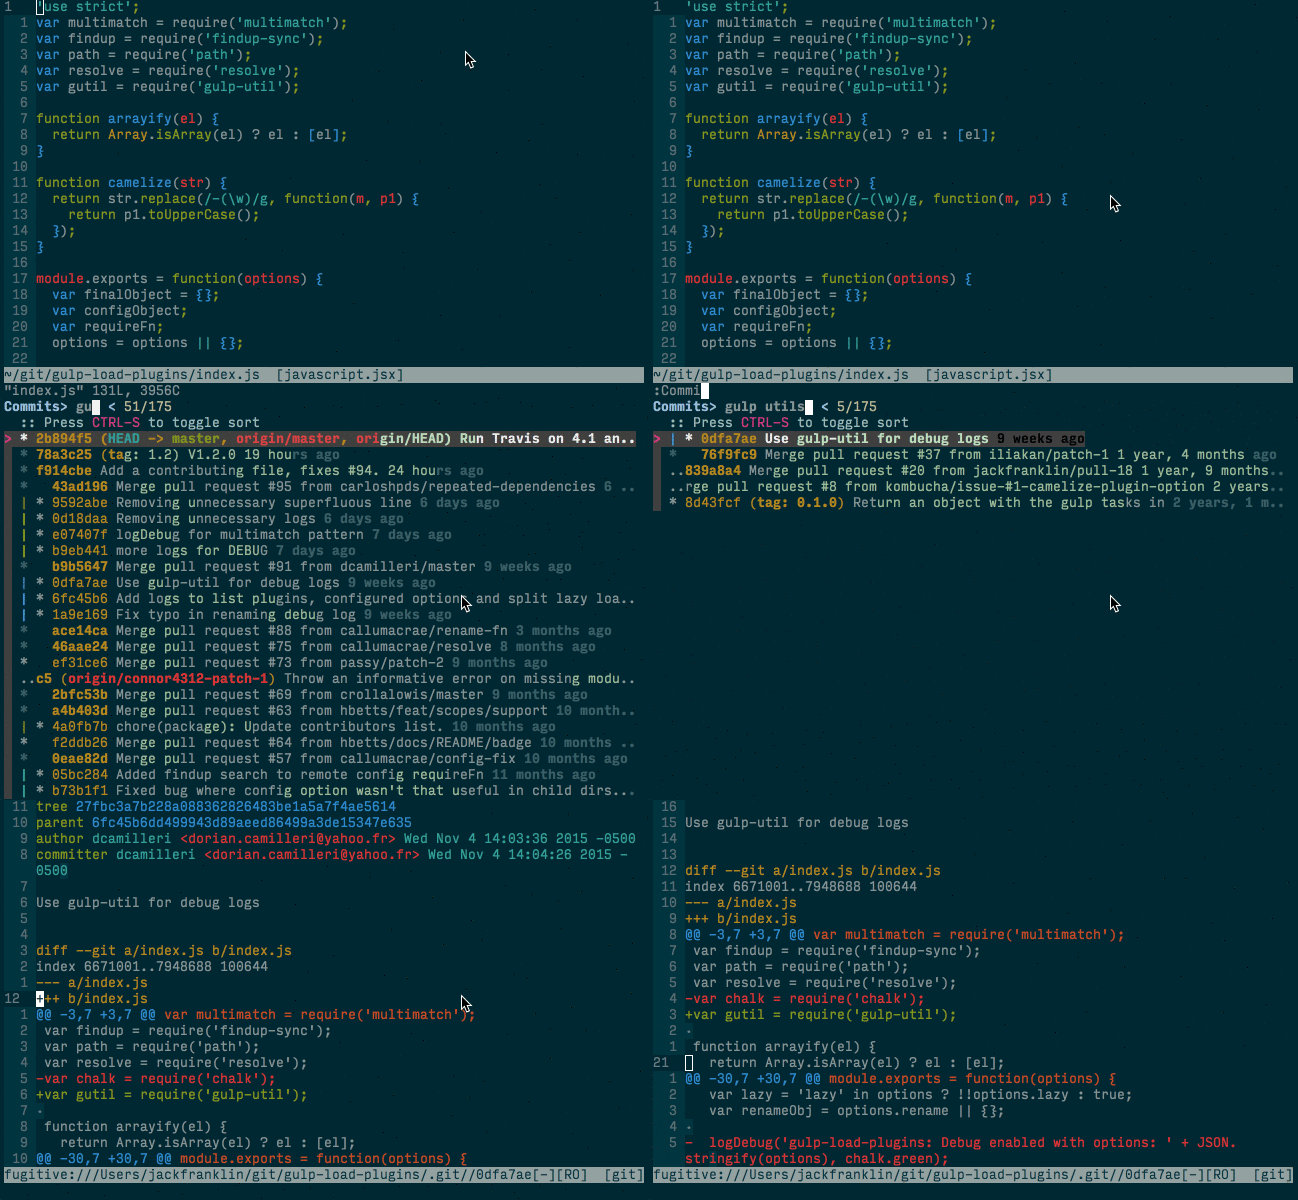
I’m also a big fan of the :Commits command, which fuzzy searches through your git commits. Note that you need Fugitive.vim for this to work.


Matching Lines

You can also use the plugin in insert mode to perform linewise completition based on what you’ve already typed! I’ve mapped this like so:

imap <c-x<c-l<plug(fzf-complete-line)

As shown in the fzf.vim README. This is really useful when you need to type a line you know you’ve typed before – for example, an import or require statement. This is effectively Vim’s linewise completion on overdrive!… Click Here


The Command Window

Vim’s command window is a nice way to view all commands you’ve previously run. I stumbled upon this today when I made a small typo in a complex search regex, and wanted to fix it. Instead of typing it all out again, or going back through the command line history by hitting : and then my up arrow lots, I was able to bring up the command line window, edit the command I wanted, and then hit enter to run it.

You can access the command window with q:. You can then navigate and edit as you would any other Vim buffer. Exit into normal mode and hit enter when you’re on the line you want to run. You can then close the buffer as normal with :q.

Much more information is available in this blog post on the command window, which goes into much more detail.

comments powered by Disqus… Click Here


vim-ruby

Last week I published a post on making Vim quicker with rbenv / RVM and it gained quite a few comments. It did help out but it was also pointed out that it was not a good way of doing things.

I was then told that the problem had been fixed in vim-ruby, but the version of vim-ruby that contained the fix was not the one bundled with the latest Vim. This will be fixed in Vim 7.4 which is not a million miles away, but if you want to get it now, you can simply bundle vim-ruby as a plugin, using the latest from Github.

Then you can safely delete this line from your config:

let g:ruby_path = system('echo $HOME/.rbenv/shims')

I have found that this change has sped up Vim hugely, even more then the previous solution, and now have one less complete hack in my .vimrc.

Hope this helps!

comments powered by Disqus… Click Here


Better Pasting from the Clipboard

Something I find myself doing fairly regularly is copying something from outside of Vim into Vim. Usually this is something like a chunk of code from a Stack Overflow post, or a new reference to add to my Bibtex file (I’m in the middle of my University dissertation…). The problem with pasting some code in is, as you’ve probably seen, that Vim tries to indent the code as you paste it. If the code already has indents (which usually it does) this is a bit of a nightmare, as you end up with incorrect indenting and have to perfom == on a number of lines to correct it.

There is a better way. We can run :set paste, which tells Vim to be in paste mode. In this mode, when you’re in insert mode and paste in, Vim will not perform any indenting itself, and let what you’re pasting in dictate it. You can then run :set nopaste to turn off paste mode.

This is good, but it’s still too many steps for me:

  1. Exit insert mode.
  2. Run :set paste
  3. Go into insert mode.
  4. Hit Cmd+V to paste in.
  5. Exit insert mode.
  6. Run :set nopaste.

That’s far too much work, and far too many keystrokes. Thankfully, we can turn this into a handy mapping. I should add that credit for this mapping goes to Ben Orenstein, as it was taken directly from his .vimrc file, all I’ve done is write it up as I thought it warranted it. Here’s the mapping:

map <Leaderp :set paste<CRo<esc"*]p:set nopaste<cr

Let’s step through that:

:set paste turns on paste mode
o inserts a new line below and goes back into normal mode
“*]p gets the content from the system clipboard, and pastes it in.… Click Here


The CamelCase Motion Plugin

I, as I expect a lot of you do, work in some languages that use camelCaseForNaming (JavaScript), and others that prefer the_snake_case_way_of_things (Ruby). I don’t really have a preference to which one I use, but sometimes I get frustrated by Vim’s w command (and the corresponding b command), and how it doesn’t treat underscores or an upper-case letter in a long variable name as a new word.

For example, if I have the following, with my cursor on the starting ‘s’:

someLongMethodCall();

What I want is for w to take me to the capital L, then to the capital M, then the C, and so on. Similarly with this code:

some_long_method_call

I’d like to be able to jump between the underscores.

I’ve never been able to find a way to do this until now. The solution is the brilliant CamelCase Motion plugin. This provides commands for jumping intelligently, as I described above, and works with both CamelCase and snake_case.

What I’ve done is simply map w, b and e to the CamelCase versions:

map <silentw <PlugCamelCaseMotion_w
map <silentb <PlugCamelCaseMotion_b
map <silente <PlugCamelCaseMotion_e
sunmap w
sunmap b
sunmap e

Thank you to Reddit user “nandryshak” for mentioning this in a r/vim thread.

w, b and e will now work mostly as before, except when it detects camel casing or snake case, at which point it will act accordingly. Perfect!

comments powered by Disqus… Click Here


Extending Visual Selections with ‘o’

A quick tip today. If you’re selecting some text with Visual Line mode (V), you can of course use j and k to extend this selection up and down. But did you know that you can use o while you’re in this visual selection to choose which end to extend the selection from?

By hitting o you swap your cursor from the top line of your visual selection to the bottom, so you can extend it both ways. This is useful if you need to extend a selection up by a few lines, and then down from the bottom by a couple of lines too.

comments powered by Disqus… Click Here


Ways to quit

In Vim you are more than likely to want to close a file at some point after opening it.

If you open a file, have a skim through and want to close it again, you can do so with the :quit command. This can be shortened to :q.

If you make some rubbish changes and want to quit and discard them, force quit with :q!.

If you make some useful changes you can write them with :w but if you want to write and quit, combine the two with :wq. If the file doesn’t currently have a filename, you can specify one with :wq {file}. If the file is read only, you can force it to save with :wq! – this should work as long as the file has a name.

For a short and sweet alternative, you can write changes (only if any exist) and quit using the :xit command or ? for short.

If you prefer to avoid ex commands, you can also use ZZ instead which is perhaps the fastest yet as it’s just a double tap of the same key.

See :help :q for more details.

Lovingly typed (in Vim) by Guy Routledge

comments powered by Disqus… Click Here


In Place code execution with Pipe2Eval

A while ago I wrote about executing Ruby code in Vim. That was cool, but I didn’t like only having that functionality available to Vim.

Then I found the Pipe2Eval Vim plugin. Pipe2Eval works similarly but has much improved support, including Ruby, JS, Python, PHP, CoffeeScript and so on.

Installation is straightforward and unlike the other solution there’s no gems to install.

By default, Pipe2Eval tries to store the temporary files it needs to /dev/shm/. On Mac OS X however, the /dev/ folder is well locked down permissions wise, so what I did was create a new folder, and export the environment variable Pipe2Eval looks for:

mkdir /tmp/shm
$ export PIP2EVAL_TMP_FILE_PATH=/tmp/shm

You may wish to add that second line to your zshrc/bashrc or similar.

Once that’s done, the plugin should work just fine. Highlight some lines you want to execute with Visual mode, and then hit the spacebar.

Here’s an example of it working for both Ruby and JavaScript.

comments powered by Disqus… Click Here